One of the first things you’ll need to do when setting up a new device is choose your default web browser. This simple task is fundamental, as it ensures that every time you click on a link, it opens in the browser you prefer, whether that’s Google Chrome, Firefox, or another option.
A default browser is a browser that automatically opens whenever you click a link or access web content. Setting this up correctly can streamline your work and improve your browsing experience.
In this blog, we’ll walk you through the process of setting your default browser on different systems, including Windows and macOS. Whether you’re a fan of Chrome or another browser, you’ll find out exactly how to set your preferred browser as the default and manage system preferences effectively.
Why Browser Choice Matters for Charities
Choosing the right browser as your charity’s default web browser can have a significant impact on your organisation’s security, and overall performance. Some browsers offer better protection against cyber threats than others, which is particularly important for charities that handle sensitive data.
Compatibility is another factor to consider: it’s essential to consider your system and apps and select a browser that works seamlessly with your device. Before you set a browser as the default, you might need to check your computer’s system specifications to ensure it will run smoothly.
Performance aspects like load times, available extensions, and unique features also influence which browser might be best. A browser that loads quickly and offers useful extensions, like for example, Google Chrome Web Store or Microsoft Edge add-ons, can significantly enhance productivity.
How to Set a Default Browser on Windows 11
Setting your default web browser in Windows 11 is a straightforward process, but it’s essential to follow the correct steps to ensure everything runs smoothly. Here’s how:
1. Start: Click on the Start menu in the bottom left corner of your screen or press the Windows key on your keyboard.

2. Settings: In the Start menu, select the Settings icon, which looks like a gear. Or, press Windows + I to open the Settings directly.
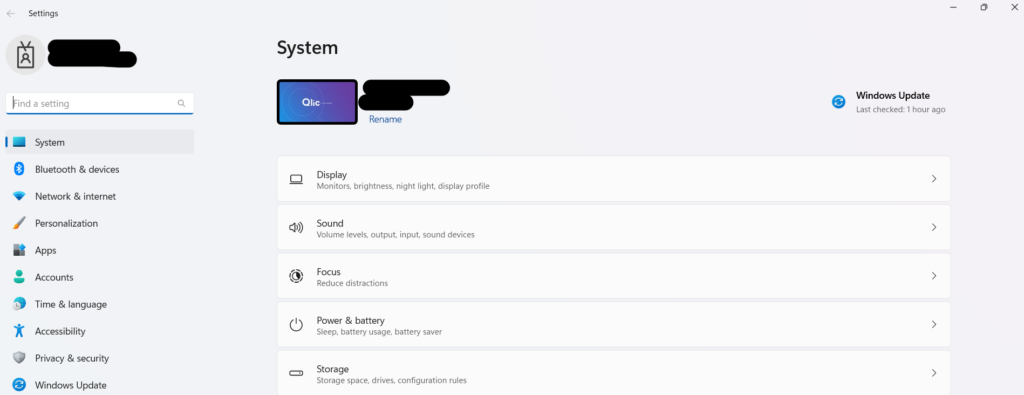
3. Apps: In the Settings menu, click on Apps. This section allows you to manage the applications installed on your computer.
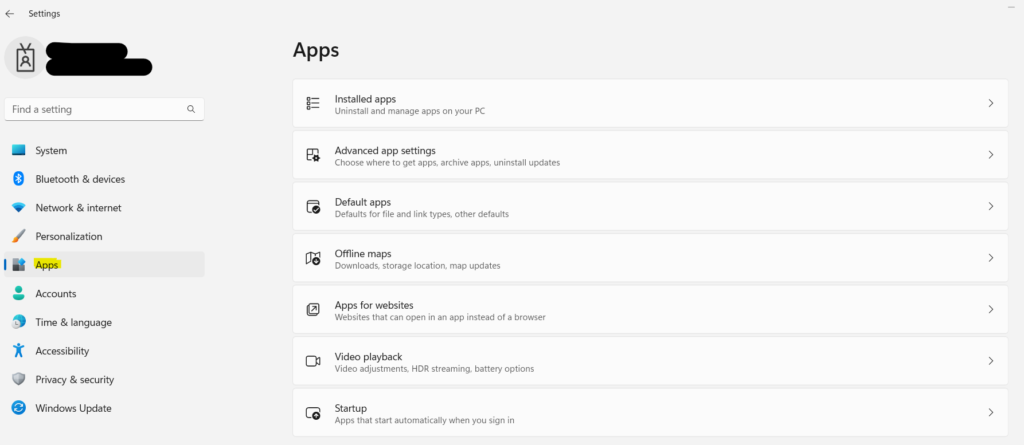
4. Default Apps: Within the Apps section, select Default Apps. You can see all the default programs for various file types and protocols.
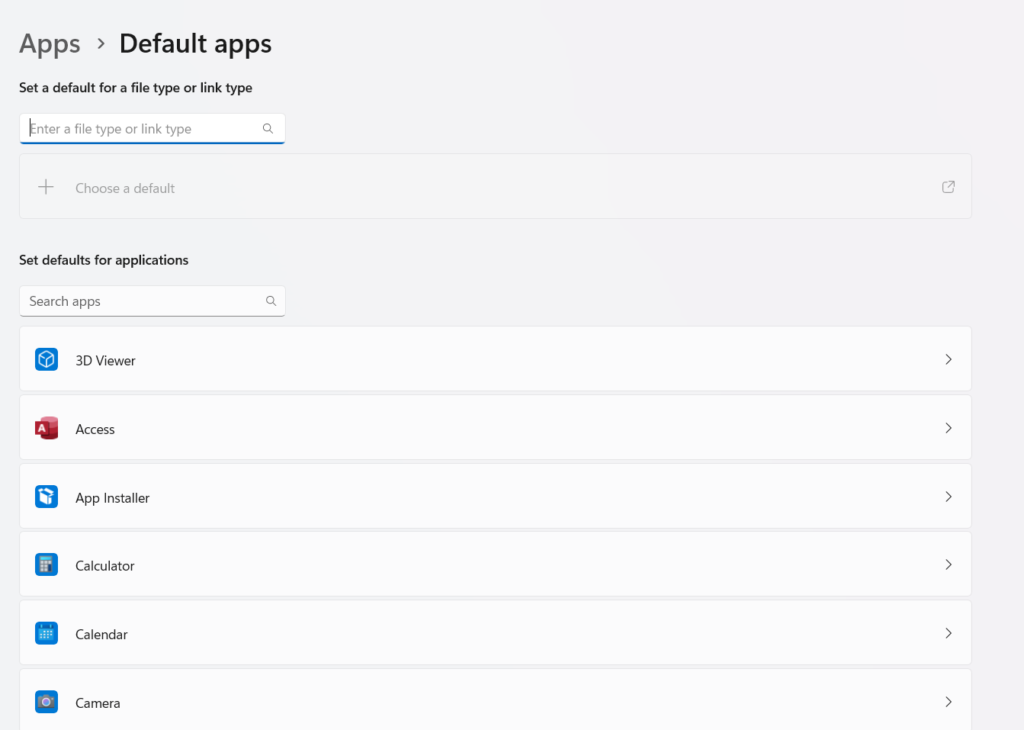
5. Select Your Preferred Browser: Scroll down until you find your preferred browser, such as Google Chrome, Microsoft Edge (which replaced Internet Explorer), or Firefox, and click on it. Then, select it as the default for relevant file types and protocols like *.htm, *.html, HTTP, and HTTPS.
For a more visual guide, we’ve also included a step-by-step video tutorial below to help you through the process of selecting your default browser on Microsoft 365.
How to Set a Default Browser on Mac
Setting your default web browser on a Mac is a quick and easy process, ensuring that all your web links and web pages open in your preferred browser. Here’s how to do it on Mac:
1.Open System Preferences: Begin by clicking the Apple icon in the top left corner of the screen and select System Preferences from the dropdown menu.

2. Select General: In the System Preferences window, click on General. This section controls many of your Mac’s fundamental settings.

3. Choose Your Default Browser: In the General tab, you’ll see Default web browser. Click on the dropdown menu next to it and select your preferred browser, such as Safari, Google Chrome, or Firefox.

4. Close System Preferences: Once you’ve selected your preferred browser, simply close the System Preferences window. Your changes will be saved automatically.
Following these steps will ensure that whenever you click on a link, it opens in the browser of your choice, streamlining your browsing experience on your Mac. You can refer to Apple’s official support page here.
How to Change Your Default Browser in Outlook 365
For those who rely on Microsoft 365, including Outlook 365 for managing emails, you might want to set a specific browser as your default for opening links. Recently, Microsoft introduced a significant update for Outlook 365 on Windows devices. With Outlook Build 16.0.16227.20280 and later versions, Microsoft Edge is automatically set as the default browser for opening any web links clicked within the Outlook app.
However, if you prefer to use a different browser—especially on non-Windows systems—you can change the default settings to suit your needs. Here’s how you can do it:
1. Open Outlook 365: Launch the Outlook 365 application on your device in the browser.
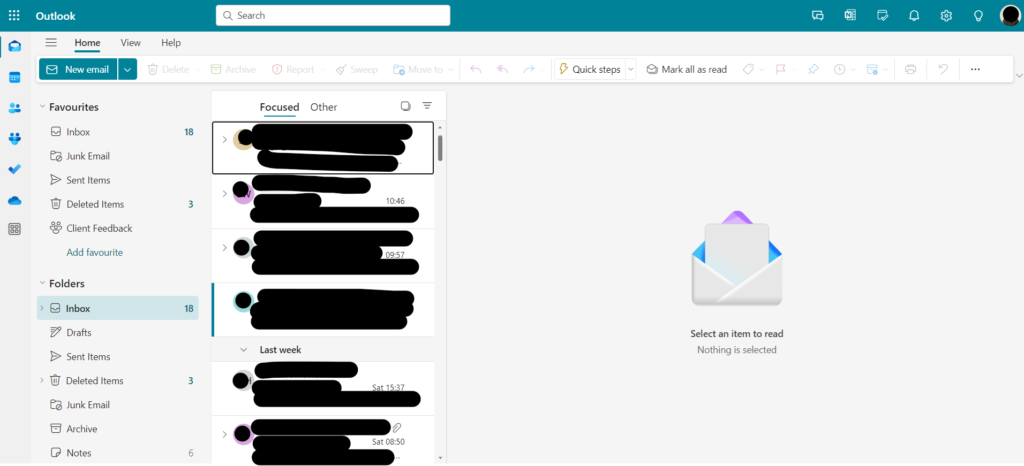
2. Access Settings: In the top-right corner, click on the Settings icon, represented by a gear symbol.
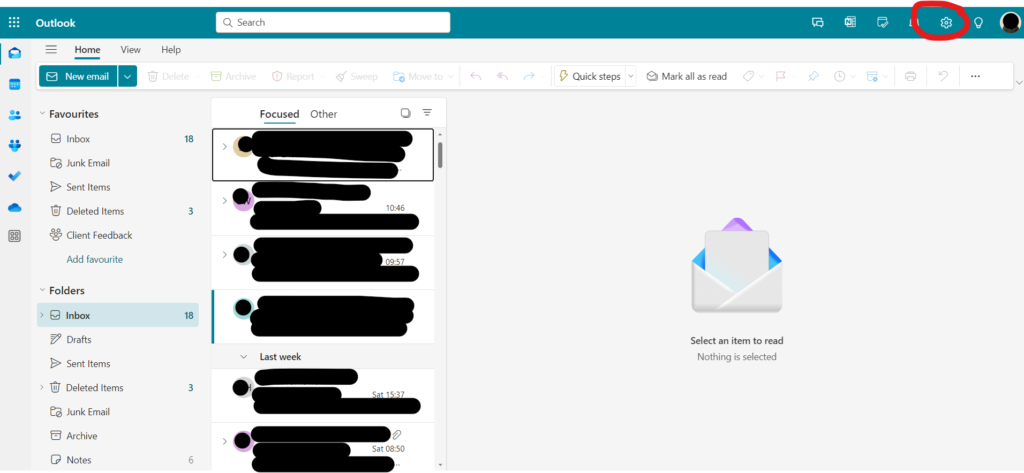
4. Choose Mail > Layout: Navigate to the Mail tab, and then select Layout from the available options.
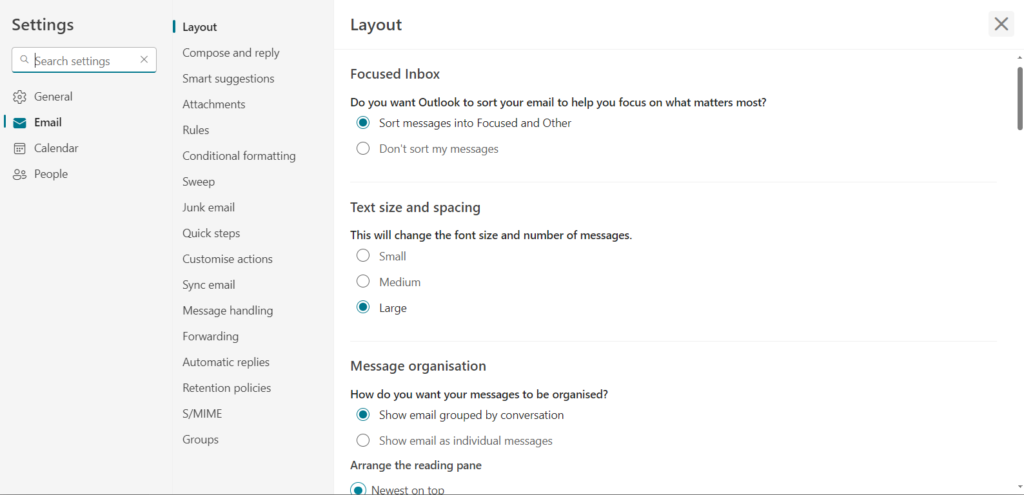
5. Set the Default Browser: Look for the option to set your default browser. Depending on your system, you may need to follow the prompts to select and set your preferred browser. After selecting your preferred browser, ensure you save the changes.

By following these steps, you can control which browser opens links in Outlook 365. For detailed guidance, you can refer to Microsoft’s post.
Closing Thoughts
In this blog, we’ve explored the importance of setting a default web browser for your device. From understanding why browser choice matters to the steps for configuring your preferred browser on both Windows 11 and Mac. We also covered how to adjust the default browser settings within Outlook 365, ensuring your links open in the browser that best suits your workflow.
The right browser can enhance productivity by reducing load times, offering useful extensions, and ensuring seamless compatibility with your operating systems and applications. By taking the time to select and set your default browser, you can create a more efficient and secure working environment.
Get in Touch
Would your charity like to optimise its IT operations and infrastructure? Book a free consultation with Qlic IT experts today by clicking the button below.


