Collaboration tools like OneDrive and SharePoint are essential for keeping teams connected and maximising productivity. Both of these Microsoft 365 tools offer cloud-based solutions for storing and managing documents, but understanding how to use them efficiently can transform how your charity operates. To better understand the differences between these two tools, check out our breakdown of their functionalities in this blog: SharePoint for Nonprofits: OneDrive vs SharePoint.
One of the most effective ways to enhance collaboration within your charity is by syncing your SharePoint library with OneDrive. This allows you to access and manage your SharePoint folders and files directly from your device, streamlining workflows and improving file accessibility.
In this blog post, we’ll walk you through the step-by-step process of syncing your SharePoint library with OneDrive with screenshots and using the OneDrive sync app and other built-in tools.
Without further ado, let’s look at the process of setting up your sync for better file management and improved team collaboration within your charity.
How to Sync Sharepoint Library with Onedrive
Syncing your SharePoint library with OneDrive is an efficient way to access your files directly from your device, helping to streamline collaboration and make document management more seamless for your charity. Before starting the process, it’s useful to understand the fundamentals of SharePoint. If you need to familiarise yourself with SharePoint’s core concepts, you can explore our guide on SharePoint basics to get a clearer understanding of its capabilities.
Here are the steps to sync your Sharepoint library with Onedrive.
- Turn on Files On-Demand in OneDrive
- Go to Advanced Settings
- Choose ‘Free up disk space’
- Turn on Files On-Demand in OneDrive
- Set Up Sync for Your Library
- Find your SharePoint files in File Explorer
- Work with Your Files in Your File System
Turn on Files On-Demand in OneDrive
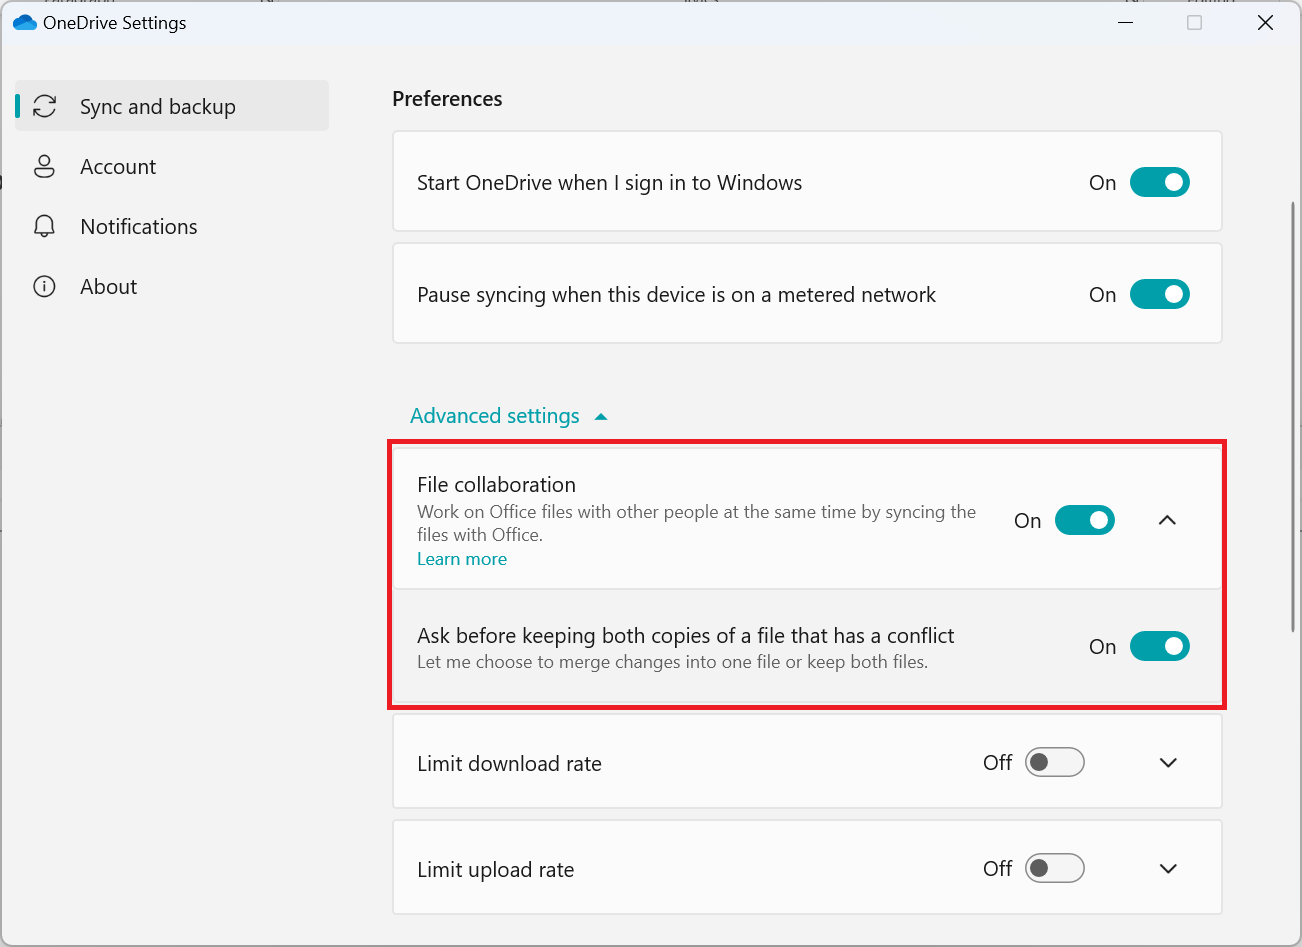
Files On-Demand allows you to access your OneDrive and SharePoint files without having to store them all locally, saving valuable disk space. Here’s how to enable it.
Go to Advanced Settings
To turn on Files On-Demand, navigate to your OneDrive settings. In the Advanced Settings section, you will find the option to enable Files On-Demand.
Choose ‘Free up disk space’
Under Files On-Demand, select the option to “Free up disk space.” This ensures that only files you choose to download are stored on your computer, while others remain available in the cloud.
Set Up Sync for Your Library
When syncing files from SharePoint libraries, you have two options:
- Add shortcuts to shared folders in OneDrive
- Sync Teams and SharePoint files with your computer
the advantage of OneDrive shortcuts is that they provide access to content across all devices, whereas sync is related to a specific device. They also deliver better performance.
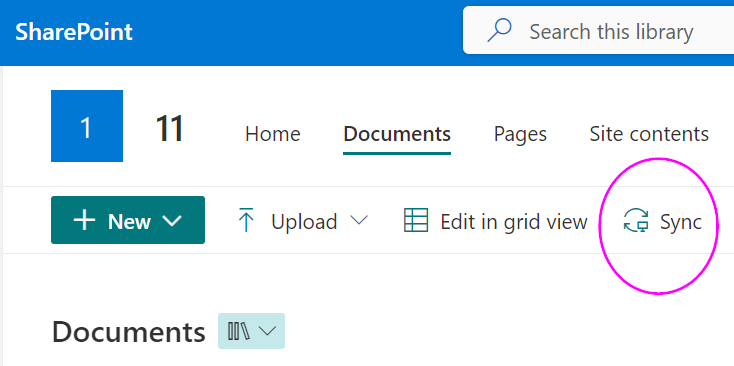
If you prefer to use the Sync button:
- In your browser, navigate to the SharePoint site where the library you want to sync is located. .
- Click the sync button in the toolbar, then sign in to OneDrive to start syncing.
Both options allow essentially the same thing—you can access files on your local computer in File Explorer or Finder and link the library to your computer.
If you prefer to use the Sync button:
- In your browser, navigate to the SharePoint site where the library of files you wish to sync is located.
- Select Sync in the toolbar, then sign in to OneDrive to start syncing.
Find Your SharePoint Files in File Explorer
Once syncing is complete, your SharePoint files will be available in File Explorer under your organisation’s name.

Work with Your Files in Your File System
After syncing, you can easily manage your SharePoint files as if they’re stored locally. You can move, copy, or open them directly from your file system. If your organisation uses on-premises OneDrive or SharePoint sites or has not yet enabled the new sync app, you can use the previous OneDrive sync app, as described in this article.
How to Sync Files with OneDrive on macOS
Syncing your files with OneDrive on macOS allows you to access important documents and collaborate seamlessly, whether your team is using a personal Microsoft account, a Microsoft 365 work or school account, or sync files from SharePoint sites. The OneDrive sync makes this process simple and efficient, providing your admin has enabled SharePoint syncing.
By following the steps below. you can set up OneDrive and choose which files and folders to sync, helping you optimise both storage space and productivity on your Mac.
- Download and install OneDrive for Mac
- Start OneDrive Setup by searching “OneDrive” with Spotlight.
- Enter your work or school account and sign in.
- OneDrive Setup
- Access OneDrive
Download and Install OneDrive for Mac
To start syncing your files, you first need to download and install the OneDrive app for macOS. You can find the download on the Microsoft website or via the Mac App Store. Once installed, OneDrive will allow you to sync files from multiple sources, including your personal or work accounts.
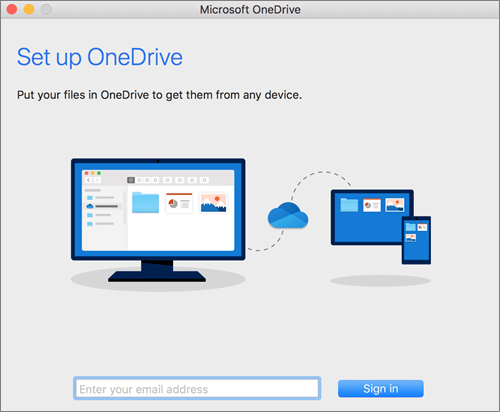
Start OneDrive Setup by Searching “OneDrive” with Spotlight
Once OneDrive is installed, you can start the setup process by searching for “OneDrive” in Spotlight on your Mac. This will open the OneDrive app and guide you through the initial setup process.

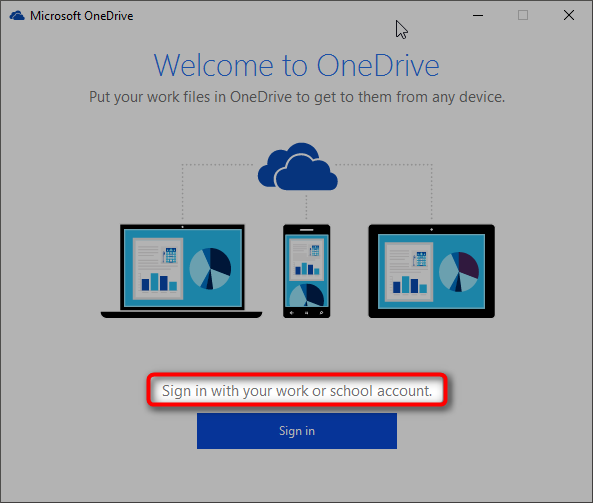
Enter Your Work or School Account and Sign In
In the OneDrive setup window, you’ll be prompted to enter your Microsoft account credentials. Choose your account: this could be a personal account, or your Microsoft 365 work or school account. After entering your details, click Sign In to continue.
OneDrive Setup
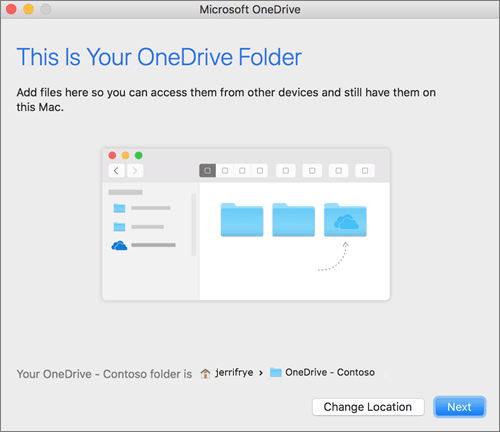
During setup, you’ll be asked to choose the location where your OneDrive folder will be stored on your Mac. You can either accept the default location or select a different folder on your computer. When you see the “This is your OneDrive folder” screen, review the path to your folder and click Next.
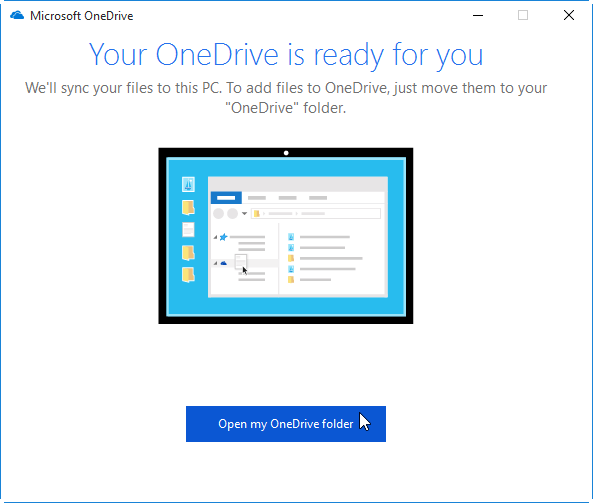
Click “Open My OneDrive Folder” to See Your Files Sync
Once setup is complete, click Open My OneDrive Folder. Your files will begin syncing to the folder you’ve specified, and you can access them directly from your Mac. Files you choose to sync will appear in Finder, allowing you to work with them as if they were stored locally.
By following these steps, you’ll have your OneDrive fully integrated with your macOS system, making file syncing and collaboration a breeze.
The Benefits of Syncing SharePoint Library with OneDrive
Syncing your SharePoint library with OneDrive offers several benefits for charities. It provides seamless access to important files and documents while improving collaboration and productivity across your team. OneDrive automatically updates and syncs data to SharePoint, ensuring your team is always working with the latest versions of files.
Let’s explore how this integration can benefit your nonprofit organisation.
Simplified and Enhanced Collaboration
One of the biggest advantages of syncing SharePoint with OneDrive is the ability to collaborate on files in real time. You can edit and collaborate on documents directly, and OneDrive ensures that all changes are synced. This keeps your team aligned and ensures everyone is always working on the latest version of a file. By reducing version control issues and ensuring smoother workflows, this setup will enhance teamwork.
Access Documents Offline
Syncing SharePoint documents with OneDrive allows you to access files when you’re offline. Whether you’re travelling or have poor internet connectivity, you’ll still have the ability to work on documents. When you’re back online, your changes will automatically sync to SharePoint and will keep your charity’s operations running smoothly.
Centralised Storage
SharePoint serves as a centralised hub for your team’s documents, making it easy to organise, store, and share files. By syncing SharePoint with OneDrive, everyone can open the library and access the same files from a centralised location, no matter where they are. This reduces confusion over file locations, improves data security, and helps ensure that sensitive information is only shared with authorised team members.
Increased Productivity and Flexibility
Syncing SharePoint with OneDrive increases productivity and flexibility. You can continue working on documents whilst travelling,or even during IT outages. This is particularly ideal for remote workers in the charity sector, as it enables you to remain efficient and effective while on the move. If you are looking to improve your charity’s team flexibility, check out our blog on how SharePoint can make remote working easier for more insights.
Closing Thoughts
In conclusion, smooth collaboration, enhanced productivity, and an uninterrupted workflow are essential for nonprofits to manage their operations and achieve their missions. By syncing your SharePoint library with OneDrive, your charity can streamline teamwork, access documents both online and offline, and provide a centralised space for all your files. This integration allows your team to stay aligned and productive, whether they are working in the office or remotely. With SharePoint and OneDrive working together, your nonprofit can ensure continuous progress and collaboration, regardless of location or internet connectivity.
Get in Touch
Would your charity like to learn more about SharePoint and OneDrive and how these tools can enhance your work? Book your FREE consultation with our IT experts at Qlic by clicking the button below
