Microsoft SharePoint is an integral tool within Microsft 365 for charities and plays a pivotal role in effective collaboration and streamlined resource management. By centralising documents, data, data management, and project management tools, SharePoint empowers charities to enhance their operations and boost their impact.
SharePoint is a comprehensive cloud-based platform for collaboration, communication, and organisation. SharePoint can transform how your charity functions, making it a great tool for modern organisations.
One key benefit of SharePoint is customisation. Expanding upon the classic experience and tailoring your SharePoint site to meet the specific needs of your charity not only enhances its functionality but also inspires your team. A well-customised SharePoint site can streamline workflows and improve user experience. Take a look at the basics of SharePoint.
In this blog, we will delve into the multiple ways you can customise your SharePoint site to better serve your charity’s needs.
Best Practices to Customise Your Charity SharePoint Homepage
Before diving into the aspects of customising your home page, it’s crucial to take into consideration careful planning. Thoughtful preparation ensures that your customisations will effectively meet your organisation’s needs. Let’s take a look into how you can plan your SharePoint customisation:
- Identify the Goals of Your SharePoint Site
Define the purpose of your SharePoint site. Understanding the purpose will guide your customisation efforts and ensure your site meets its intended purposes. - Assess Organisational Needs
Identify key requirements for your SharePoint site. This includes considering navigation structure, content management strategies, and achieving a balance between functionality and aesthetics. - Consider Cross-Device Usability
Ensure your SharePoint design is responsive and functions seamlessly across different devices, including desktops, tablets, and smartphones. - Keep in Mind Accessibility and User-Friendliness
Design your SharePoint site to be accessible to all users. Incorporate user-friendly features such as intuitive navigation, clear labels, and easy-to-read fonts. - Maintain Consistent Branding
Reflect on your organisation’s identity by incorporating consistent branding throughout your SharePoint site pages.
By following these steps will help to effectively customise your SharePoint homepage to better serve your charity’s needs.
How to Customise your Charity SharePoint Site: Step-by-Step Guide
There are a number of different ways you can customise your SharePoint in Microsoft 365 or Sharepoint Server 2019 which allow you to create a unique workspace tailored to your charity. From themes and headers to navigation and footers, each element can be adjusted to enhance usability and reflect your brand. Below are the steps to help you get started:
- Customise the Theme
- Customise the Site Header
- Personalise the Logo
- Customise Site Navigation to Enhance User Experience
- Add a Site Footer
Customise Your SharePoint Theme
Customising your SharePoint theme is the first step to personalising your site. This involves changing the colours, fonts, and overall look to align with your charity’s brand.
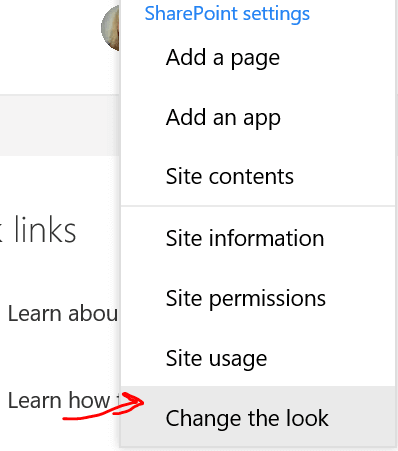
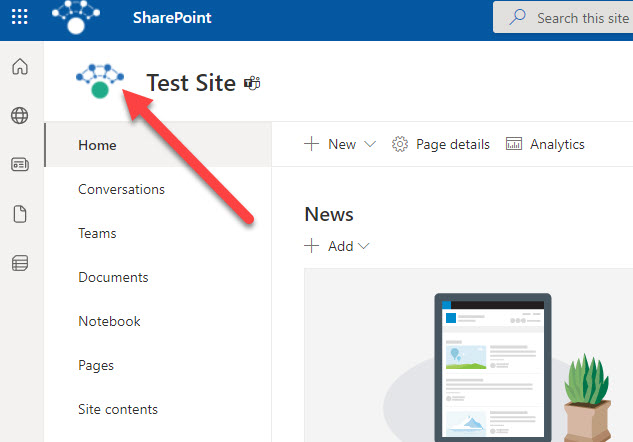
- Go to your SharePoint site and click on the gear icon (Settings).
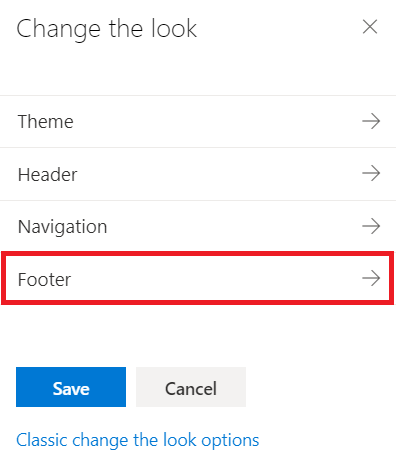
- Select “Change the look”.
- Choose a theme from the available options or create a theme by selecting “Customize”.
Customise Your SharePoint Site Header
The site header is one of the first things users see, so it’s essential to make it visually appealing and informative.
- Click on the gear icon (Settings) and select “Change the look”.
- Select “Header” and choose a layout.
- Upload a header image that meets the recommended dimensions for optimal display.

Personalise the Logo
Adding your charity’s logo helps reinforce your brand and makes your site recognisable.
- Go to your SharePoint site settings.
- Click on “Title, description, and logo”.
- Upload your logo and adjust the settings to ensure it displays correctly.
Customising Site Navigation to Enhance User Experience
Effective navigation is crucial for ensuring your users can easily find the information they need.
- Click on the gear icon (Settings) and select “Site contents”.
- Choose “Site settings” and then “Navigation”.
- Add, remove, or rearrange links to suit your organisation’s structure and user needs.
Add a Site Footer
A site footer can provide additional information and links that are accessible from any page on your SharePoint site.
- Click on the gear icon (Settings) and select “Change the look”.
- Choose “Footer” and enable it.
- Add links, text, or images to the footer to provide useful information and resources for users.
For a more in-depth guide on these customisation steps, you can refer to Microsoft Support.
There are also templates available, such as the SharePoint Volunteer Center template, which can provide a great starting point for your customisation efforts.
SharePoint Site Advanced Customisation Options
Advanced customisation options for your SharePoint site can enhance its functionality and usability. Here are some advanced customisation features to consider:
- Add custom web parts
- Add an app to a SharePoint site
- Create and customise SharePoint libraries
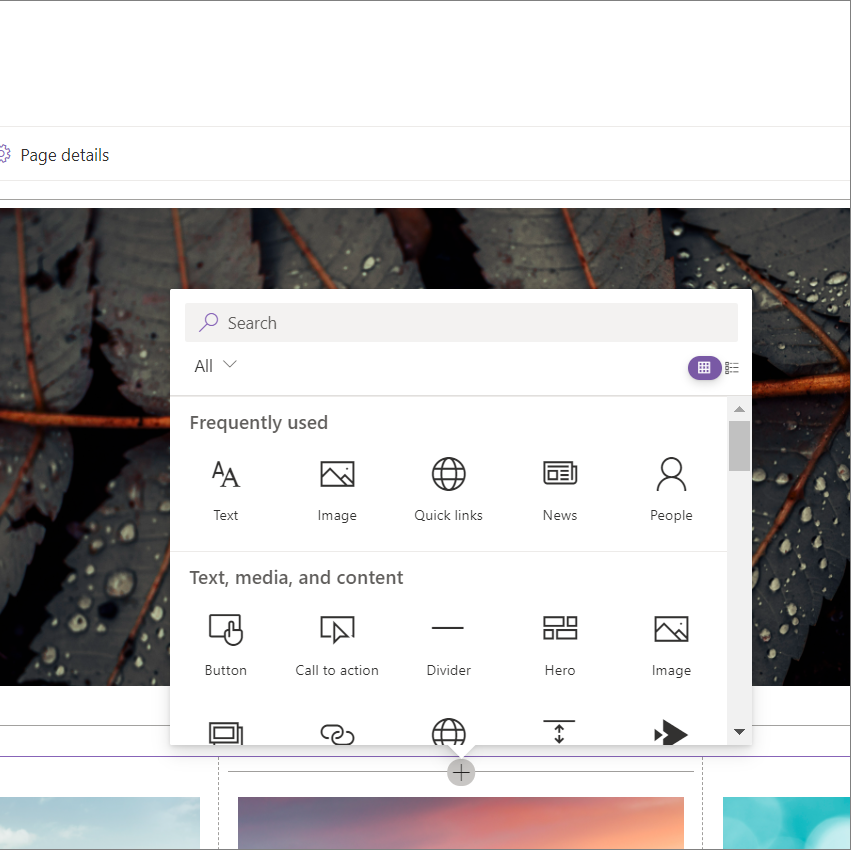
Add Custom Web Parts
Web parts are modular components that you can add to your SharePoint pages to display various types of content. Custom web parts allow you to integrate external services and enhance the functionality of your site.
To add a custom web part:
- Navigate to the page where you want to add the web part.
- Click on the “Edit” button at the top right of the page.
- Hover over the section where you want to add the web part and click the “+” icon.
- Select the web part you wish to add to the list.
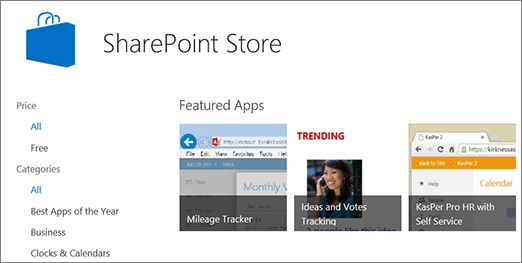
Add an App to a SharePoint Site
SharePoint apps are add-ons that provide additional functionality to your site. These can range from document libraries and task lists to custom business solutions tailored to your charity’s needs.
To add an app to your SharePoint site:
- Go to the site where you want to add the app.
- Click on the gear icon (Settings) and select “Site contents”.
- Click on “New” and then “App”.
- Browse through the available apps or search for a specific one, and then click on “Add” to install it.
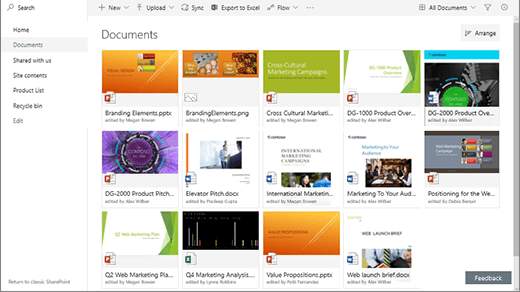
Create and Customise SharePoint Document Libraries
Document libraries are essential components of SharePoint, designed to store and manage documents.
To create and customise a document library:
- Navigate to the site where you want to create the library.
- Click on the gear icon (Settings) and select “Site contents”.
- Click on “New” and then “Document library”.
- Enter a name and description for your library, and click “Create”.
Customising a library with a template can streamline processes and ensure consistency across your documents. Learn more on what document libraries are and how to set a custom SharePoint Document Library template.
Conclusion On Customising SharePoint
Customising your SharePoint homepage is a great step to enhance your charity’s organisational efficiency and foster a collaborative environment. By tailoring your SharePoint site, you’ll create a user-friendly interface and improve overall productivity.
The benefits of using SharePoint are manifold: streamlined document management, effective project coordination, and centralised information that is easily accessible to all members of your organisation. Keeping your content fresh and relevant ensures that your team remains engaged and that the information on team sites always up-to-date, facilitating better decision-making and collaboration.
In conclusion, by investing time in customisation, you can harness the full potential of SharePoint and drive your organisation towards greater efficiency and success.
GET IN TOUCH
Would your charity like to find out more about SharePoint or get support on maintaining an effective SharePoint intranet? Book your FREE Consultation with our IT experts at Qlic by clicking the button below.